Already using Anki and want to know how to study more effectively with the flashcard program? In this post, I will show you my top 9 tips to work more effectively and efficiently with Anki.
Jump directly to specific topics with the following overview:
In a nutshell
- 1. Create Several Cards for Difficult Subjects.
- 2. Add Additional Information to your Cards (e.g. links to literature)
- 3. Structure Your Decks with Tags (Keywords)
- 4. Use the Cloze Function (Card Type)
- 5. Work with Images
- 6. Use Image Occlusion – Hide Parts of Images
- 7. Use the Mobile App (Ankimobile or Ankidroid).
- 8. Focus On What's Important
1. Create Several Cards for Difficult Subjects.
Sometimes it is not enough to create just one card for a topic, because you only take one point of view. Especially for complex topics, it makes sense to create different cards, which take different perspectives.
This makes it easier for you to understand connections, context and links. But what does that mean in Anki?
Use different card types
The idea is to vary the information on the front of the card more. Besides the normal approach (question? answer!) you can ask a question in a different way. Here are a few ideas:
- Answer? Question: Turn the tables and create a card where you see the actual answer first and then have to remember what the related question is.
- Use pictures: Instead of text on the front, you can use pictures.
- Use different questions: Are there other possible questions to get the same answer?
Especially if you’ve had trouble remembering this one fact, you’ll notice that you’ll quickly see success with this tactic, even if some of the cards may seem redundant.
2. Add Additional Information to your Cards (e.g. links to literature)
If there is additional information to a card, it is useful to show it using an additional field on the back of your card. This could be your own notes, comments from the lecture or additional sources.
This helps you to better put individual flashcards into context and to connect individual pieces of information.
Add a new field to a card
To add an additional field to a card, simply go to Card Editing > Click on Fields > and then on “Add”.

3. Structure Your Decks with Tags (Keywords)
Structure is always useful if you want to learn effectively and efficiently. In Anki, you have several ways to organize your learning materials.
Decks in Anki should only be seen as a very rough category. It is not recommended to create many different decks and subdecks. This is explained in the user manual among other things.
You can easily add tags in the browser. In fact, you can only assign tags to notes, not to individual cards. (Here you can read again what the difference is).
Tagging instructions:
- Select the notes you want to tag.
- Then click either in the top menu (Notes) or with the right mouse button on Notes > Add Tags
- In the next window you can then simply add one or more tags (separated by a space).

You will find the added tags in the left bar at the bottom of the browser. If you click on one of the tags, only the notes that have this tag will be displayed.
This is how I do it. But you can also add tags directly when creating a note or learning.
Example: In a big deck of Spanish vocabulary, you could use the tags to divide the terms by word types (nouns, verbs, etc.), for example.
Study cards with a specific tag
Of course, once you’ve divided up the cards, you’ll want to have the option of studying only the cards with a particular tag.
This is how it works:
- In the deck overview or in the browser you click on Tools (or Edit) > Create Filtered Deck.
- In the next window, you first choose a name for the new deck and then you enter “deck:(name of the original deck) tag:(tag you want to filter by) in the search field.
- Then you click on “create”
- The new temporary deck will now be displayed in blue in the deck overview and you can study it normally.

Tip: Besides the normal Anki algorithm you can give heavy cards a tag (e.g. “Heavy”) while learning. Then you can study the difficult cards again separately with a filtered deck.
4. Use the Cloze Function (Card Type)
By default, you use flashcards with one text field on the front and one on the back. These cards are of the Basic type. However, you can customize the note type to create more sophisticated cards.
With note type “Cloze” you can, as the name suggests, make cards with one or more gaps in the text, which you have to remember. This way, you can not only learn very effectively, but also create different cards very quickly, which just query different gaps in the same text.
Cloze instruction
- The note type “Cloze” has a primary text field and an extra field for additional information.
- Insert the relevant text into the text field.
- Then select the text you want to hide with the mouse.
- Then you can either click on this icon ([…]) in the menu or hide the selected text with a key combination (CMD+Shift+C or Ctrl+Shift+C).
- You can hide several places in the same text.
- Automatically each new placeholder gets a higher variable (“c1”, “c2”, “c3”, etc.). For each different variable, a separate card will be created.
- If you want to query two placeholders on one card, you just have to make sure that both have the same variable (e.g. “c1::…”).

With this approach, you can create cards very effectively in a few minutes.

Tip: Open your lecture slides and Anki in parallel. This way you can copy relevant texts in a few seconds and create your flashcards with a few clicks.
5. Work with Images
Most people can remember pictures better than words. This has been scientifically proven several times. In this article you will find a good summary.
So if we don’t link a fact with a word but with a picture, the probability is higher that you can remember it.
For this reason, I would recommend you working with images on your flashcards where possible. You will notice that learning will be easier and at best you will perform better.
In Anki you can easily add pictures compared to traditional flashcards.
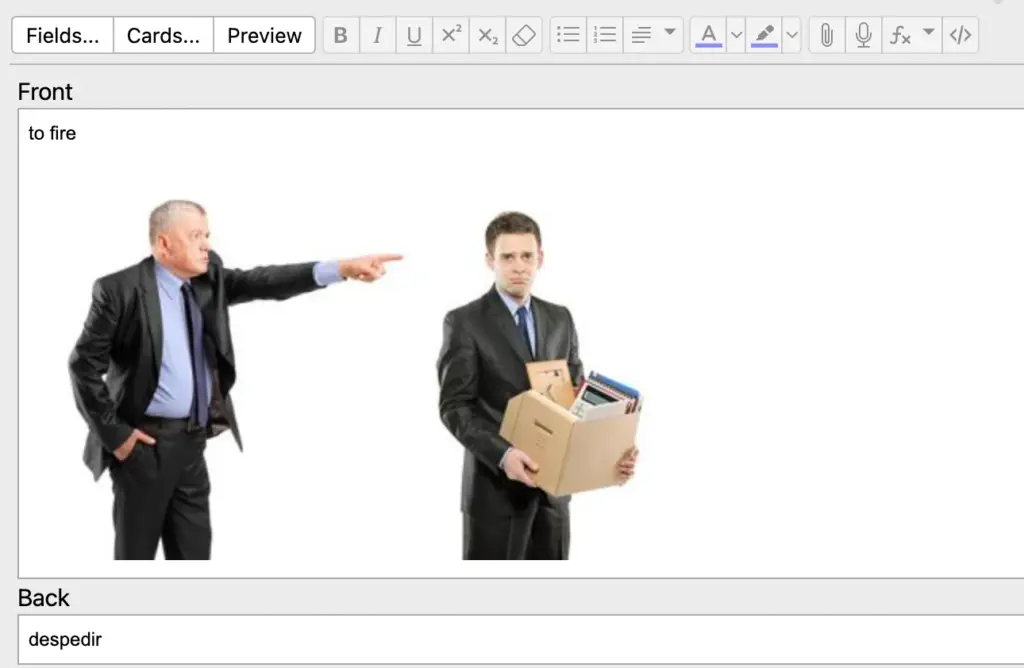
3 easy ways to use pictures in Anki
There is a separate article on this topic if you want to read more. The summary is as follows:
3 ways summary
- With copy & paste or drag & drop, you can add images to cards quite intuitively.
- If you have a large amount of cards, you can use the add-on Batch Download Pictures From Google Images to add pictures automatically.
- With the Media Import add-on, you can quickly create new cards from an image folder.
Tip: My favorite trick for adding images is to save screenshots to the clipboard. This way you can quickly capture the most important content from PDFs or lecture slides and paste them into Anki.
6. Use Image Occlusion – Hide Parts of Images
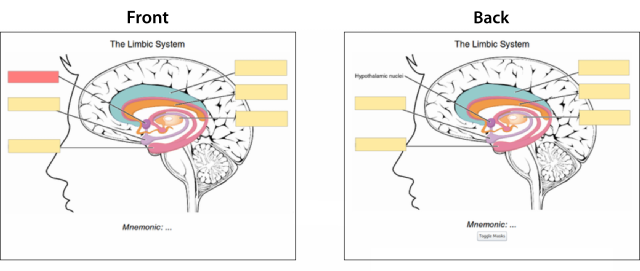
An even more advanced approach than just using images is Image Occlusion. The Anki add-on combines the advantages of cloze texts and images and gives you a whole new way to learn in Anki.
With the Image Occlusion Enhanced add-on from Gluatinimate, you can create cards that hide parts of images to put your knowledge of this hidden information to the test. So with the add-on, you can create and learn cloze texts on images.
This is how you do it
I have already written a detailed tutorial about the Image Occlusion add-on. There you can read everything in detail. Basically, you proceed as follows:
- Download the add-on and add it to Anki
- Open the edit mode of Image Occlusion
- Upload an image oder paste it from the clipboard
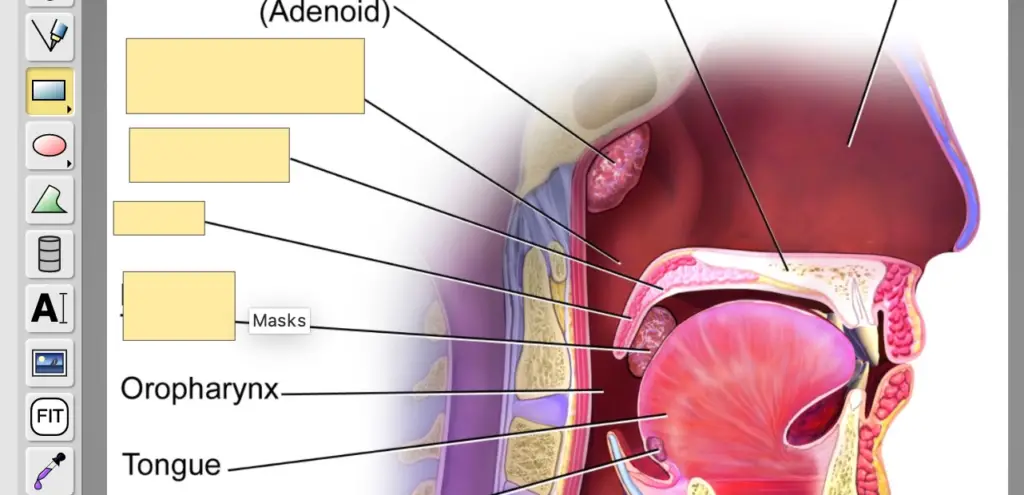
- Use the rectangular, oval or free shapes to cover areas on the image
- If necessary, you can group several shapes together so that the areas under them will be queried together.
- Finally, you can create a card for each hidden area with just one click. You have two options for this:
- Hide All, Guess One: This option creates one card for each shape used. All areas are hidden and only one area at a time is revealed while learning.
- Hide one, Guess One: This option creates one card per shape used. Here, only one area at a time is hidden and will be revealed during learning. The others are visible.
7. Use the Mobile App (Ankimobile or Ankidroid).
Usually, Anki is a desktop program. But of course, there is also the possibility to use the software on your smartphone or tablet. And that’s exactly what you should do!
We use our smartphones every day and if you are honest, usually too much. For example, in a recent US study, the majority of respondents use their phones 5-6 hours (!) a day. Mostly it’s apps like Instagram, YouTube or TikTok that get most of the attention.

But this time can be used more effectively with Anki. And that’s exactly what Anki apps are perfect for. While Anki is available for free for Android devices (Ankidroid) , the iOS app AnkiMobile costs a whopping $25.
At first glance, this seems a bit unfair. But even the 25 Dollars should not stop you from using the app! On the contrary, if you spend some money on the app, you have one more reason to use it.
Desktop for creating and the app for learning
I also use the iOS app and have not regretted the purchase for a second. Because mostly, most of the time I study on my smartphone. Whether I’m on the couch, on the way to work or on vacation, I always have my Anki cards ready.
The app is only somewhat suitable for creating and editing cards. This is why I only use it to study. For everything else, I use the desktop version.
8. Focus On What’s Important
Anki may seem a bit complicated and plain at first. There are many add-ons that can change that. However, you quickly run the risk of losing sight of what’s really important: Disciplined learning.
From my own experience, I know how important this last tip is. It’s easy to get lost in testing different add-ons, meticulously tagging your decks with keywords, or trying to format your flashcards in a special way.
The actual learning sometimes gets lost in the process. Therefore my tip: Study first, then optimize! Before you haven’t done your daily reviews, you should not do anything else in Anki.
Perfection often is the enemy of success.
Study smart, not hard 🎓

