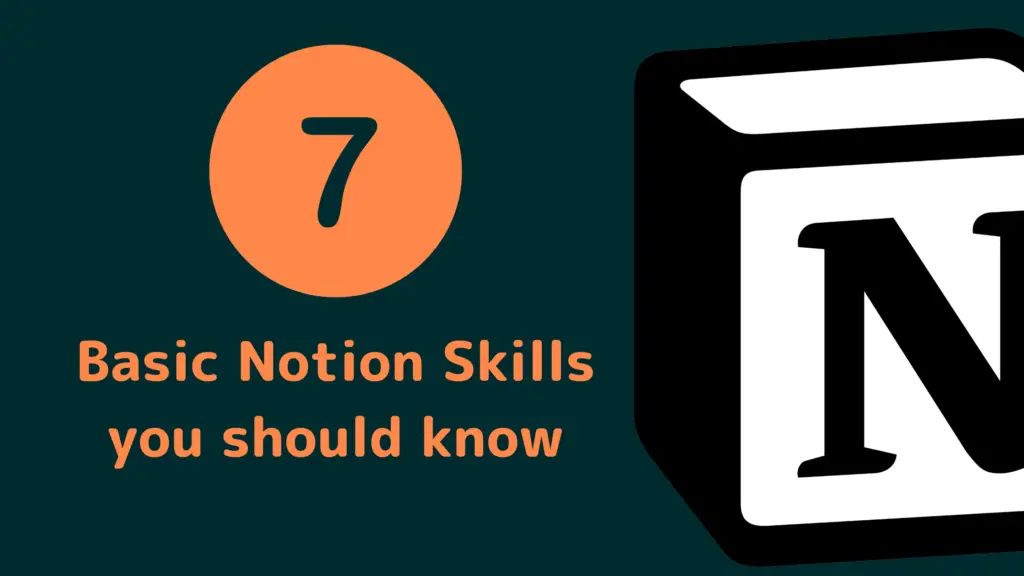
Notion is a powerful tool that you can use to organize your daily life, work or study. It helps you stay organized and has all your notes in one place.
However, even though Notion is quite intuitive, at first you may not understand some of its features right away. So in this post, I’ll show you 7 basic skills in Notion that you should be able to do.
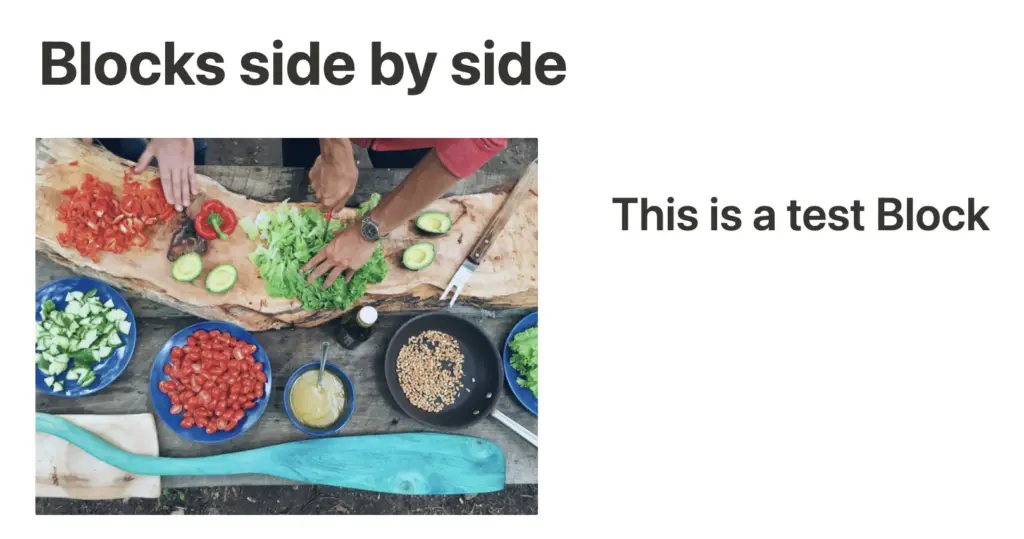
1. Arrange blocks side by side
Quick guide:
- Find the 6 anchor points of the block
- Drag with the mouse to the corresponding position
- Are indicated with a blue line
First of all, you need to understand how the Notion platform is built. The tool consists of so-called blocks. These are several elements for a page, for example, text, images, tables and much more.
New blocks are created when you press Enter. They are then marked with the line “Type / for commands”. If you move the mouse over them, you will also see a + and six dots. These dots are important to be able to move blocks.
If you hover over the six dots, the mouse changes directly into a hand. In addition, a small text field appears that tells you that you can drag the block back and forth or open the submenu with a click
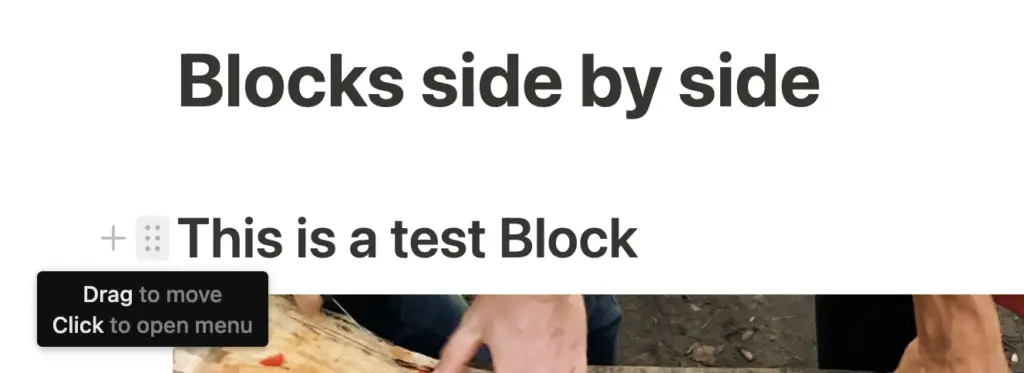
These points serve as anchors, so to speak, and can be easily dragged through a Notion page. You can place them below, above or even next to another block. Accordingly, the locations are always marked with blue lines.
2. Embed a page
Quick guide:
- enter/embed
- Select a page from the dropdown menu or insert the link separately
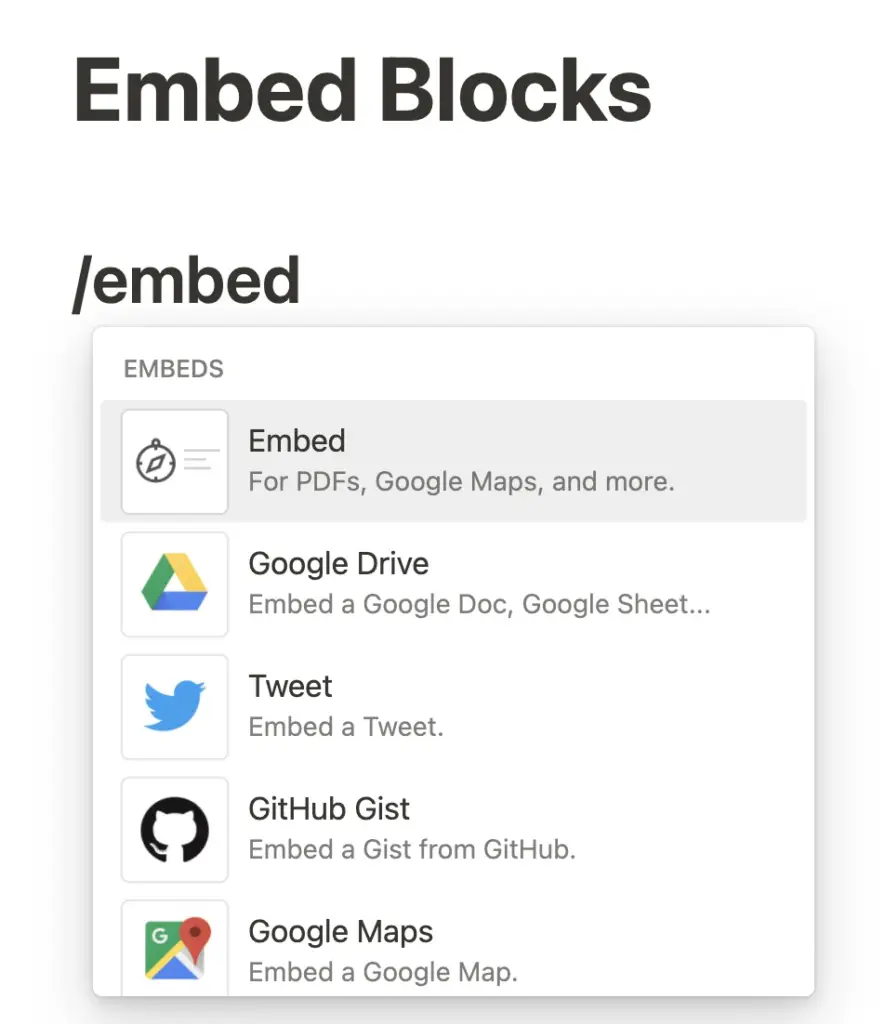
Notion is good at embedding content from other sites. There is already a list of websites that can be officially embedded into Notion pages. So you can click directly from your Notion to the corresponding website and continue surfing
These sites include, for example, Twitter, Google Maps and Drive, GitHub, OneDrive, Dropbox and also Zoom.
To embed a web page, you have to type /embed in the command line. Here you will see the examples that are officially supported by Notion
If you have an existing account with another website, for example, Google Drive, then you have to log in separately. This data will be saved and can be viewed in the settings under “My connections”.
More detailed instructions for embedding PDFs and music (e.g. via Apple Music) can be found in these articles:
3. Use icons in text
Icons and emojis are perfect for adding a personal touch to any Notion page. You can choose from a list of hundreds of small icons.
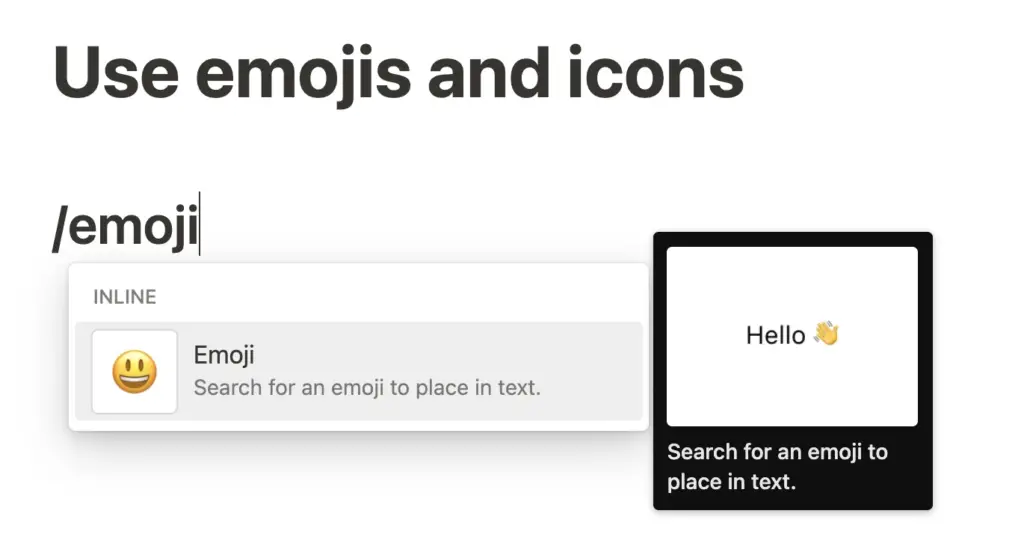
These are also color customizable. To insert them into an existing text, you have to type /emoji in the appropriate place. Then you can select a smiley.
But it is easier to use a key combination:
- On Windows it is the Windows key + dot
- On macOS it is Cmd + Ctrl + Space
- You can also enter a colon and the name of the corresponding emoji. This also works outside of Notion.
4. Create table/database
Tables and databases are the heart of Notion and allow a diverse view of different data. There are two ways to create a new database.
The first is directly when creating a new Notion page. When you do this, you are presented with a blank page with light gray text. In the lower section, you will find the elements of the databases. These are: Table, Board, List, Timeline, Calendar and Gallery.
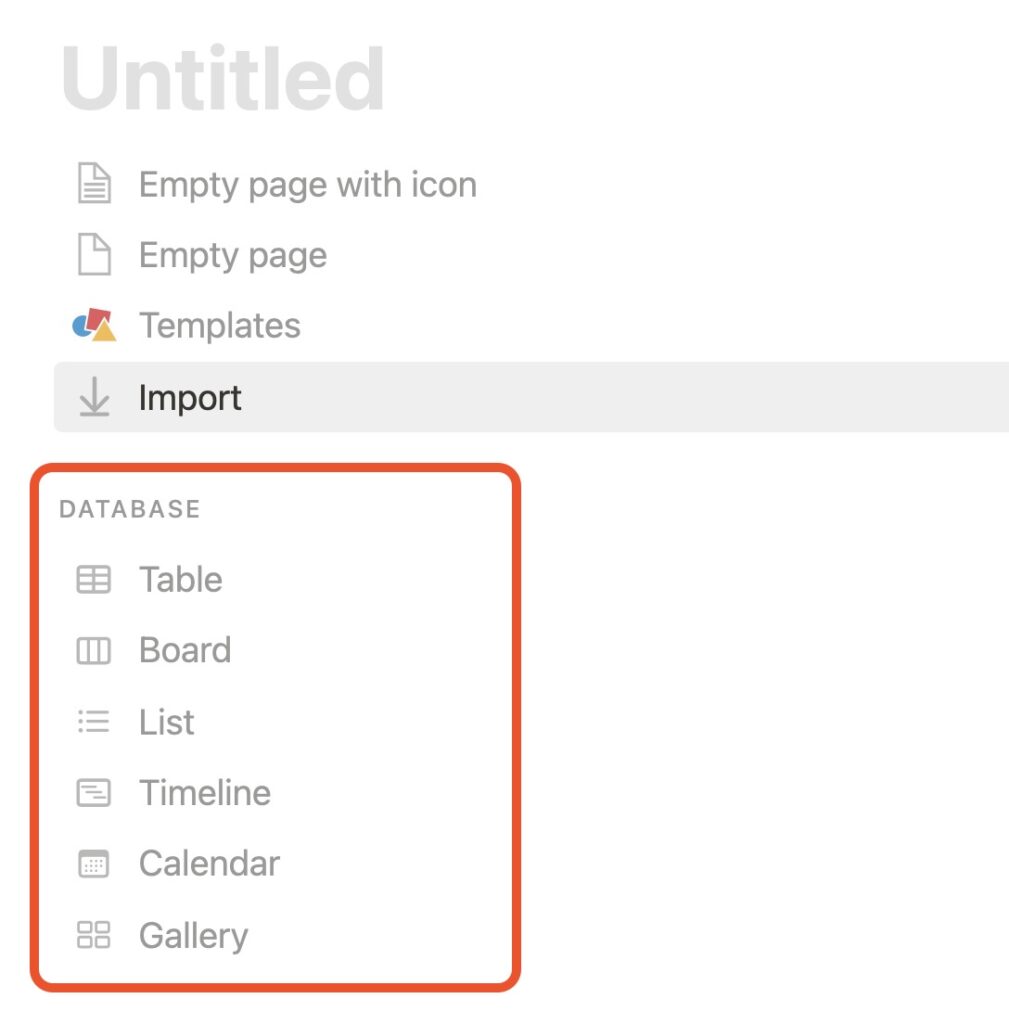
Select your desired database here.
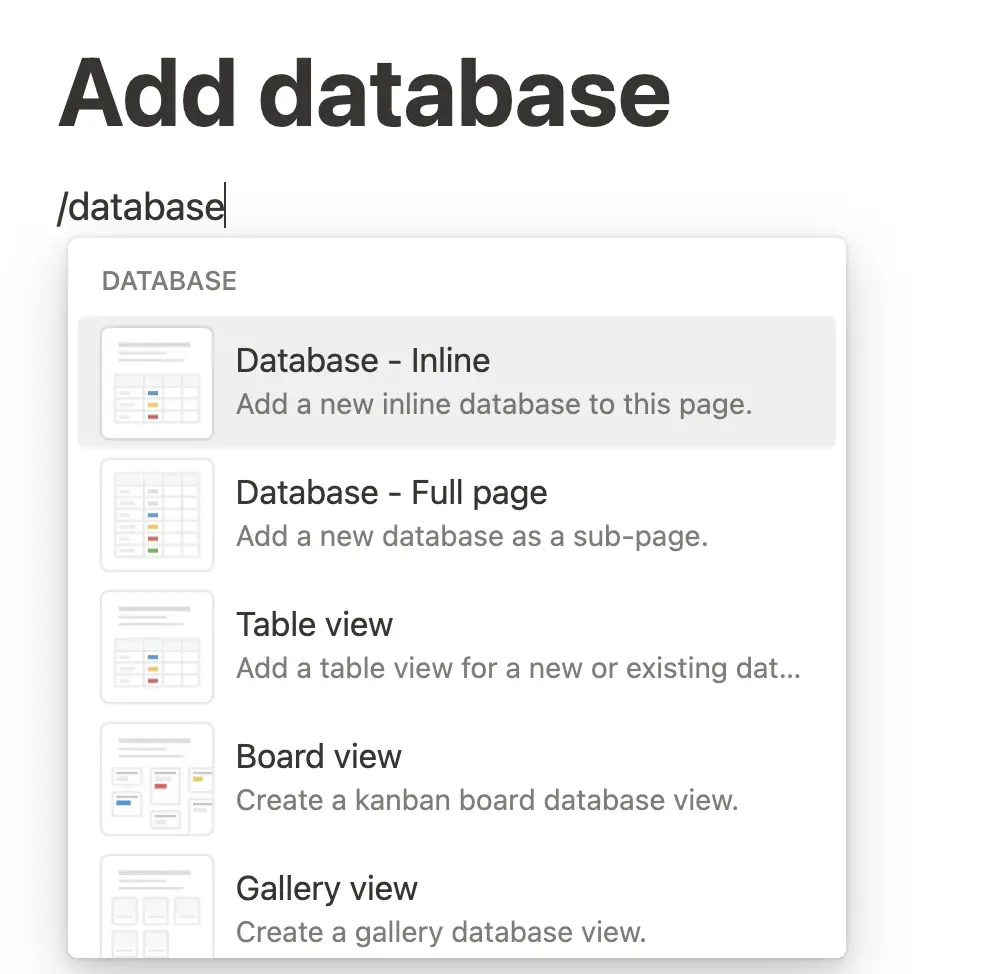
If you have an existing site, you can also create a new database there. Enter /database and choose if it should be a separate page (Full Page) or embedded (Inline). Again, select your database and insert it into the page.
4.1 Create columns in a database
The columns of a Notion table are a versatile tool for sorting data. You have to think of each row as a separate subpage of Notion that can be edited separately. Accordingly, the columns also merge into these sub-pages and data can be matched.
To add or edit a column, simply click on the corresponding column header. For a newly created table these are “Name”, “Tags” and the plus symbol.
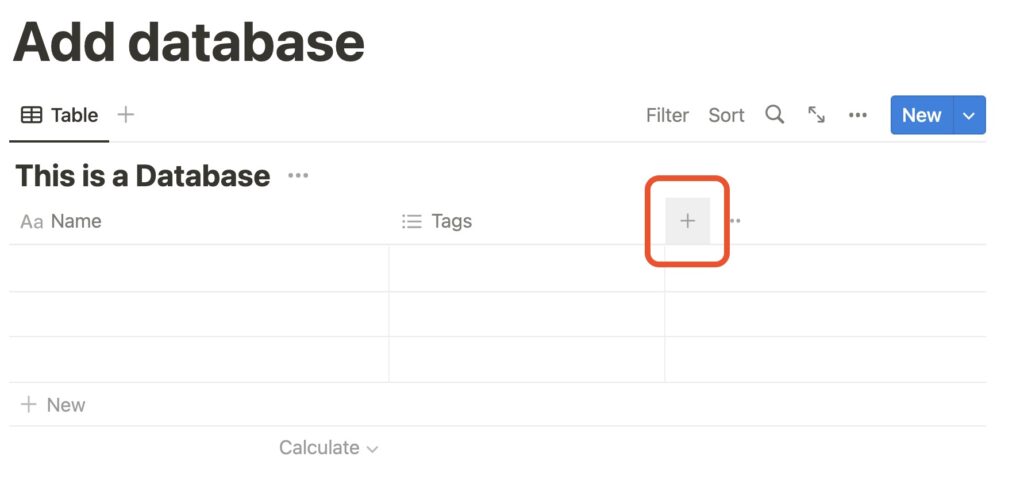
Under “+” you can then select the type of column. Notion will give you a corresponding list. Here you can insert anything from simple text and numbers, to links, files, time spans and much more.
4.2 Copying a table
There are different ways to copy tables:
1. If the table is a separate page, then this complete page can be copied. To do this, click on the six anchor points and then either Ctrl + C or click on “Copy Link” in the submenu.

Then paste at the appropriate place with Ctrl + V. Here a submenu will pop up asking if the table should be synchronized with the original or if a separate table should be created.
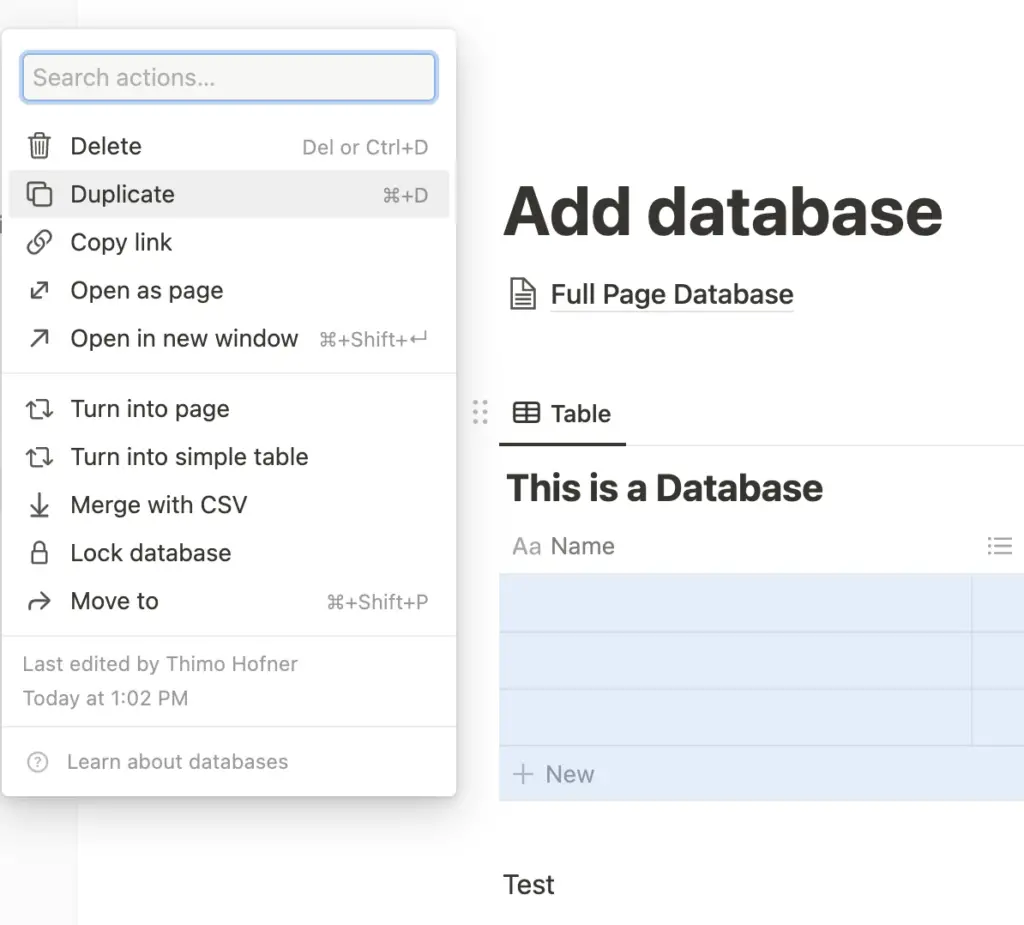
2. You can also duplicate a corresponding table. To do this, either click on the three dots on the page overview and select “Duplicate” or do the same for the six anchor points.
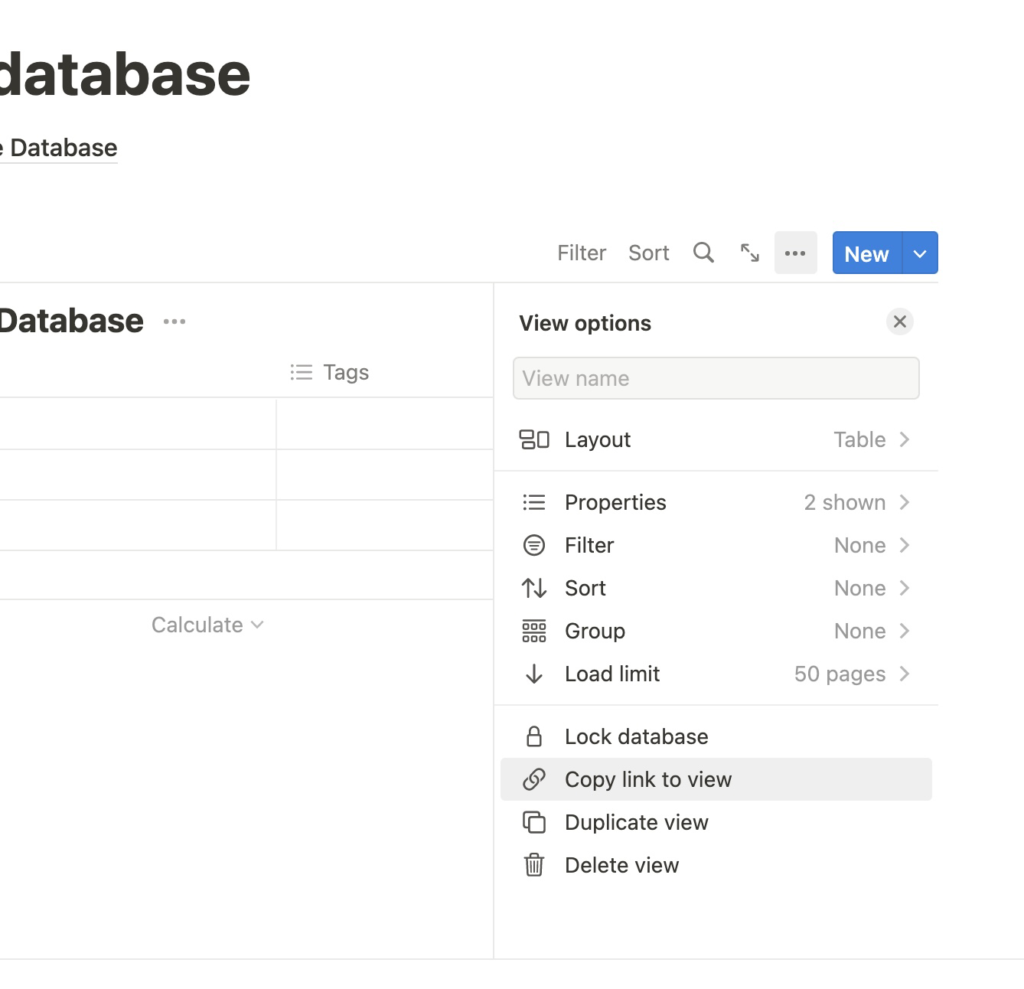
3. A last possibility is to click on the three dots in the upper right corner of an existing table, next to the blue “New” button. There you can select either “Copy link to view” or “Duplicate view”.
This will only copy the view and the table will be updated on the corresponding new page when you insert it. There appears the item “Create linked view of database”.
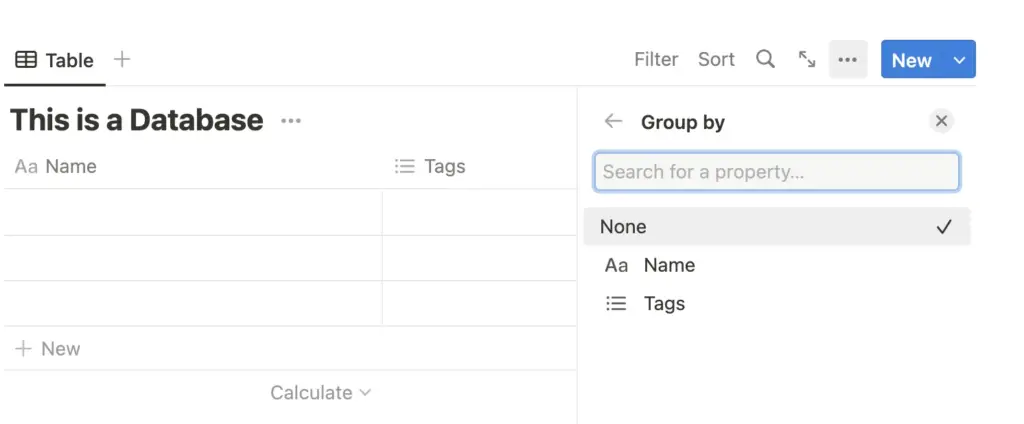
5. Group blocks
Within a database you can group single blocks. You can customize them by the previously selected columns. If you have an existing table, click on the three dots in the upper right corner.
There you will find the subitem “Group”. This way you can better overview a database if you have many entries and they are assigned to different subprojects or work sections.
6. Linking blocks – How to jump directly to specific blocks?
Meanwhile you can also copy, link and synchronize single blocks. This gives you a better overview in a large database and allows you to jump back and forth between individual blocks and sub-pages. There are several ways how you can link blocks.
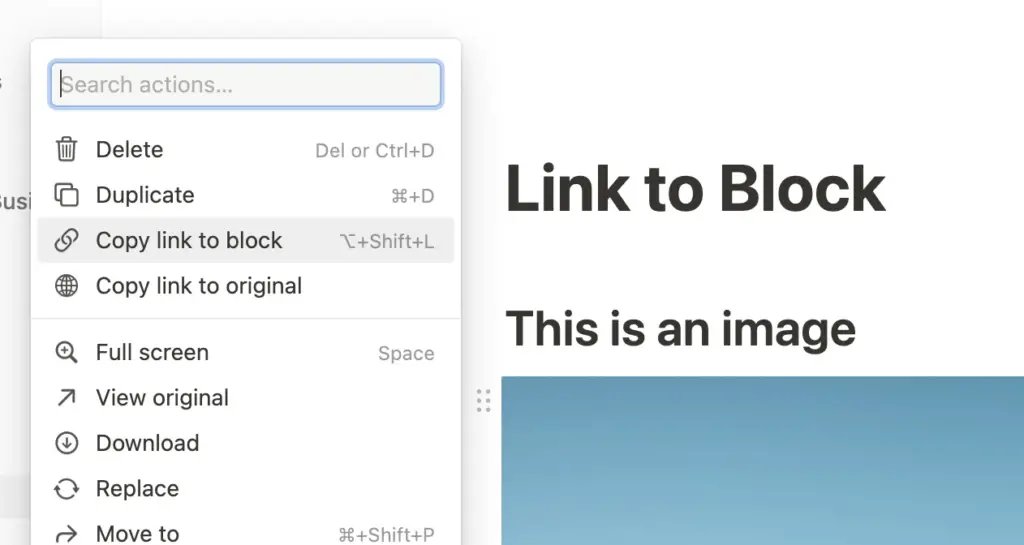
6.1 Use link to block
If you want to link to a specific block, select the corresponding block at the anchor point. In the submenu there is the item “Copy link to block”. With this you have created an individual link for a block.
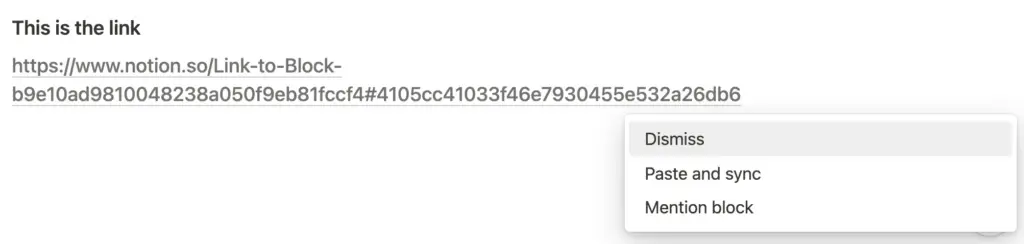
When pasting on another page you now have the choice to paste the same block and synchronize it at the same time “Paste and synch” or just add a link/mention “Mention”.
If you have copied the link, you can also attach it to a specific word. To do this, select the corresponding word or phrase and then click on “Link” in the menu . Here Notion usually already shows you corresponding subpages, but you can also simply paste the previously copied link to a specific block.
6.2 Way via Table of Contents
A Table of Contents works in Notion similar to any other writing program. If you have a very long page or subpage on Notion, you can easily insert a Table of Contents.
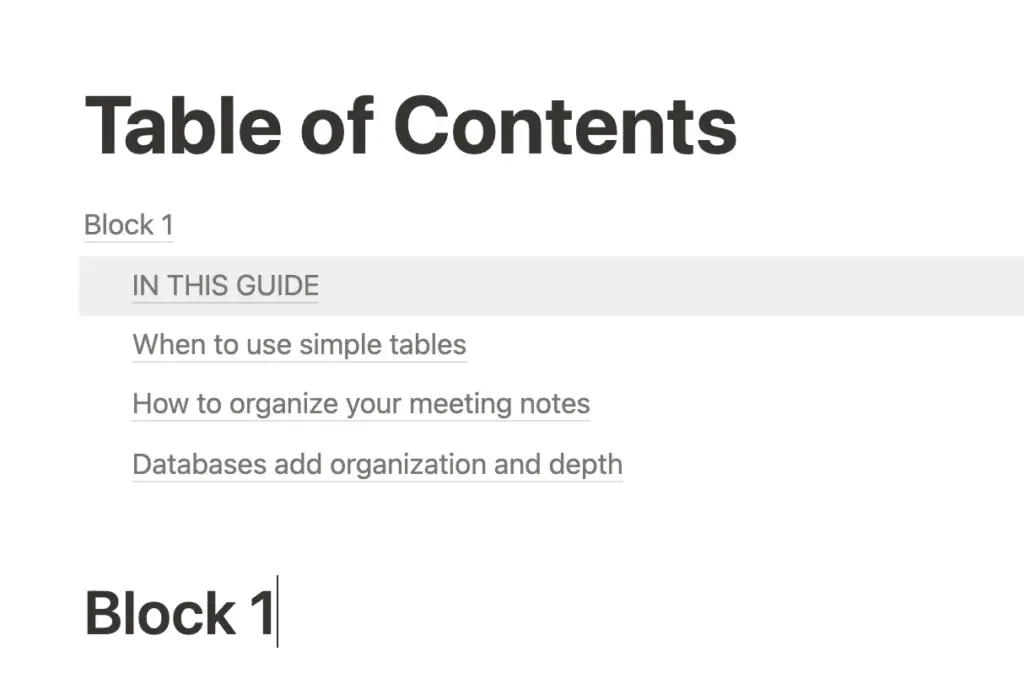
The only requirement is that you use headings. There are three different large headings to choose from. Notion takes these headings and automatically creates a table of contents when you type /table of contents in the command line.
7. Add and delete comments
Comments are an important feature, especially if you share Notion with multiple people. These comments are then synchronized and everyone can see what someone else has commented. There are several ways to add a comment.
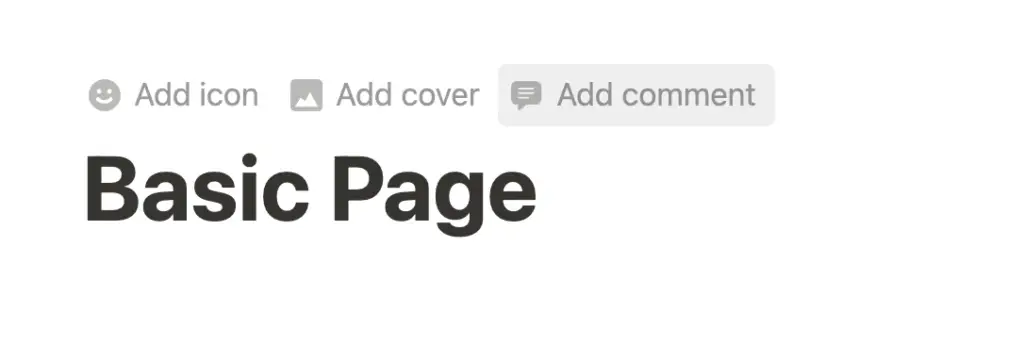
1. Hover your mouse over the top of a page. Between the icon/emoji and the header, you should see an “Add comment” item appear here. This will then appear at the top of the page and can act as a chat window of sorts. You can also attach files or tag people with @.
2. Every single word can be commented. To do this, simply highlight it and then click on “Comment”. All comments will be displayed in the sidebar. You can change how they are displayed in the page settings (three dots in the upper right corner) under “Customize page”.

You can delete any comment using the three menu items and “Delete comment”. The comment will also be deleted if you accept it by checking the “resolve” box.
Hopefully these short instructions could help you. Continue with Notion and always remember:
Study smart, not hard 🎓